Well, there’s one positive thing that’s come out of the Coronavirus pandemic for us. Our 3-year-old learned to ride a bike! Skip down to “Steps to ride” if you wanna cut to the chase.
Backstory:
He had a micro scooter since he was 16 months and then at 2 years we got him a Strider balance bike. He had already gotten pretty good on the scooter, so when it came to learning the balance bike, he didn’t have the patience for it. The bike would easily fall over and hit his leg. “Why do this when it hurts?” I’m sure he thought. He couldn’t be bothered. He could already enjoy the scooter without the hassle, so he preferred using that.
Around 3 years, my husband, aka “Mister I-can’t-pass-up-a-good-sale-on-equipment,” comes home with a bike with training wheels from the neighborhood bike store that was going out of business. I was so annoyed. Training wheels were so old-school and he’s even Dutch for goodness sake. Dutch kids are born with balance bikes!
Of course, when I saw the huge smile on my son’s face, I knew there was no turning back, and he instantly loved it. The training-wheeled bike was a hit and he rode around everywhere with it. He was so proud to be a big boy, and ride with the older neighborhood kids. He would even do skid-stops and turns getting overly confident with the compliments. Meanwhile, those kids that had been at it with the balance bike were soon able to graduate to real biking. But he was happy, and that’s what counted.
Fast forward, about 10 months. The Covid-19 pandemic just started and now we had at lot more time together. We figured it was a good time to take advantage of that. We had heard about the Woom bike and how easy it was for kids to learn to ride on it. It does have a hefty price tag though (Woom 2 is $359, Woom 1 is $199), so we were still hesitant. But then we saw a new one posted on Craigslist, so that made our decision easy — you know how my husband can’t pass up a deal.
We got a Woom 2 and took off the petals so our son could learn to balance bike properly. He had unlearn turning and balancing as he had with a training-wheeled bike; when you turn on a bike with training wheels you lean away from the turn direction, whereas on a balance bike and proper bike you lean into the turn.
Our son rolled around the neighborhood every day for two weeks to practice proper balancing. We saw that he became pretty comfortable balancing, so we figured why not try out the pedals on the weekend. We put the pedals back onto the bike and within minutes he started biking!
Not claiming here that this is the only or absolute method, but wanted to share the steps that worked for us. We watched a few videos on techniques, but we didn’t find them to be useful. Many involved a dad just pushing an older kid from behind the bike seat and then was like, “There you go–he’s riding!”. It made us laugh out loud because there wasn’t any real guidance. This is why I figured I’d write it out.
Steps to ride:
-
Buy a balance bike.
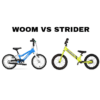
We think the Woom bikes are the best on the market in terms of quality and features, but not cheap. Try Craigslist first, they go fast! Strider is also a good bike. Check out my post, Best first bike for a toddler? Woom vs Strider for a side-by-side comparison. Ultimately, it depends on how tall your kid is as to the final recommendation.
-
Teach them how to brake.
A bike like the Woom has two types of braking–hand brakes and reverse pedal braking. Make sure they are comfortable with at least one of these, in addition to just putting the feet down.
-
Encourage big steps. Step, Step, Coast.
To get the feel of the balance, encourage your kid to take big steps and then coast, letting the speed naturally guide them to balancing.
-
Practice balance on small downslopes.
Look for a place where it has a small decline so that the bike will naturally roll down, but not so steep that it goes too fast or feels too dangerous. Ask them to practice bringing the feet up on the sides to rest on the center of the frame and of course put the feet down on the ground on the sides if they feel unstable.
-
Ride the bike daily
Ride for about two weeks or until they are looking comfortable. Start with short walks and keep it fun. End before they get tired of it. Go once or twice a day.
-
Add pedals.
Once they’re confident and the coasting/balancing looks very comfortable, add on the pedals.
-
Stay close by.
But not in the way or give too many tips while they are riding. Maintaining balance and focus while pedaling takes a lot of energy at first, and it’s easy to get distracted or frustrated if someone is in the way or talking too much.
-
Practice starting and stopping.
Go to a smooth open area, like a basketball court and practice riding around. Ask your child to ride over to you or a certain point/line and stop to make sure that they can stop in the future at will, like at intersections or to avoid someone/something.
-
Practice, but make sure that they are having fun!
Ride out to somewhere close by and then after practicing biking, try another activity like Tag, soccer, frisbee, Ring Around the Rosie, just to give them a break and then get back on the bike back home.
-
Take your time.
There’s no timeline, no need to rush; this should be enjoyable. If it starts to feel like work or your kid isn’t into it, it’s ok, give it time. There are plenty of other activities to try in the meantime and maybe after awhile they will be into again.
Other accessories to consider:
- Bike helmet:
This one you need! My current vote is the Giro Scamp MIPS for a toddler (head size 51 – 55 cm). Here are the considerations:- A lip for those front facing accidents, providing a little room to protect the face. I noticed when my toddler was on a scooter, he once tipped forward from leaning on the bar and having that little lip at the visor area, prevented him from scratching his face. Ones with a visor would probably be even better.
- No-pinch buckle. Our toddler has gotten pinched from his Bell helmet a couple times, and got scared every time that we’d pinch him. Go for the no-pinch buckle and save those tears.
- Protection (or course!) – once you learn about Multi-directional Impact Protection System(MIPS) it’s hard to not feel like you need it. This seems especially important if your baby is in tow or if they are speed demons. The Giro Scamp MIPS is top of the line at $59. The less expensive Giro Scamp without MIPS at $39 still seems to be a popular choice.
- Note, most bike helmets are only certified for biking use. If your kid is going to be skateboarding or scootering as well, consider a dual certified helmet that is designed to protect from impacts from crashes while biking or skateboarding.
- And vice-versa, not all helmets that are skateboard-style are dual certified. A dual certified helmet will have stickers on its interior that say CPSC (Consumer Product Safety Commission) and ASTM (American Society for Testing and Materials).
- You can check out this overall list for helmet safety ratings by the Bicycle Helmet Safety institute. I’d cross-check what you might buy here. Warning, the research here may lead you down quite a rabbit hole.
- Bell or Horn:
Once they feel super comfortable, this is a fun and safe add-on to get. Make sure it’s something they can easily do with one finger and isn’t too annoying to hear. Believe me, that it/you will be tested regularly. - Bike light:
I like the ones that are inexpensive that just wrap onto the frame without any installation like these Schwinn LED ones. - Gloves:
We don’t have these yet, but I imagine this can be good especially for grip in the winter months or to save some hand scuffs.
What are your favorite biking tips? What worked for you?
*When you buy through links on our site, we may earn an affiliate commission at no cost to you. This helps to cover our operating costs to keep this site running. Thank you!


Leave a comment